Novitas Solutions has issued their reminder that is it decision making time. The following information was released in their MLN Connects newsletter on Friday, November 14, 2025:
As you plan for next year, CMS reminds you of the advantages of participating in Medicare:
You’re paid the full Medicare Physician Fee Schedule allowed amount. If you’re a non-participating provider, Medicare pays 5% less than the Medicare Physician Fee Schedule allowed amount.
Medicare pays you directly (on an assignment-related basis).
Medicare forwards claim information to Medigap (Medicare supplement coverage) insurance (if any).
By December 31, 2025, all physicians, practitioners, and suppliers – regardless of their Medicare participation status – must decide whether to participate for CY 2026.
You don’t need to do anything if you’re:
Already participating in Medicare, and you want to continue your participation
Not currently participating, and you don’t want to participate
National Plan and Provider Enumeration System (NPPES) Taxonomy Please check your data in NPPES and confirm that it still correctly reflects you as a health care provider with the appropriate taxonomy and correctly reflects your current practice address. Incorrect data in NPPES may lead to unnecessary inquiries about your credentials and delay enrollment with Medicare and health plans
When filling out credentialing forms, resist listing multiple taxonomy codes to show all your specialties. It may seem logical, but it often backfires. Insurers process codes, not logic, and multiple codes can lead to issues like higher copays, misrouted claims, or denials. For example, a family doctor adding Sports Medicine saw patients charged specialist copays for routine visits, and a nurse practitioner with Psychiatry and Family Practice codes had claims denied under mental health benefits.
Your Type 1 NPI is singular—you can’t split specialties. Multiple codes don’t boost visibility; patients find you through websites, referrals, or marketing, not taxonomies. Payors control directories, and extra codes often cause headaches, not solutions. Stick with one primary specialty (e.g., Family Practice) and promote additional services through marketing. Multiple taxonomies lead to denials, frustrated patients, and extra work. Keep it simple—one taxonomy saves time, money, and stress.
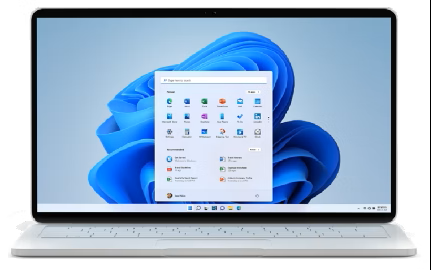
Microsoft’s Windows 11 introduces powerful features; however, the less-discussed aspect of Windows 11 is its handling of System Restore points. Restore points are critical for system recovery but currently have a limited lifespan of 10 to 60 days, depending on the release installed. This article explains what restore points are, why they’re essential, how to enable System Protection and create restore points, and why users must be proactive in managing them given their short retention period.
What Are Restore Points and Why Are They Needed?
A System Restore point is a snapshot of your computer’s system files, registry settings, and installed drivers at a specific moment. Think of it as a time capsule for your PC’s configuration, allowing you to roll back to a previous state if something goes wrong—like a faulty driver, a problematic Windows update, or a misbehaving application. Unlike backups, restore points don’t include personal files (documents, photos, etc.), focusing solely on system-level components. This makes them a lightweight, targeted recovery tool.
Restore points are vital because they provide a safety net for troubleshooting without requiring a full system reinstall. For example, if a new software installation causes crashes, you can revert to a restore point created before the installation, undoing the changes while keeping your personal data intact. They’re especially useful when testing new configurations or during major Windows updates, which can sometimes introduce unexpected issues.
However, restore points aren’t permanent. In Windows 11, Microsoft has confirmed that these points are automatically deleted after a set period, ranging from as little as 10 days to a maximum of 60 days, depending on the version and update installed. This short retention window, combined with the storage-hungry Recall feature, makes it critical for users to understand and manage restore points effectively.
Windows 11 Restore Point Retention: 10 to 60 Days
Since Windows 11’s release in 2021, the retention period for System Restore points has been inconsistent, often defaulting to just 10 days in earlier builds, though some users reported points lasting up to 90 days. With the June 2025 security update (KB5060842) for Windows 11 version 24H2, Microsoft standardized the retention period to 60 days. This means that any restore point older than 60 days is automatically deleted, regardless of available disk space, and earlier versions may purge points even sooner—sometimes in as little as 10 days.
This reduction from Windows 10’s typical 90-day retention period has sparked concern, especially as medical providers leave Windows 10 (which reaches end-of-support on October 14, 2025) to Windows 11 for HIPAA related reasons. The shorter lifespan is partly attributed to disk space management. If disk space allocated for restore points fills up, older points are deleted even before their retention period expires, making regular manual creation essential.
How to Turn On System Protection and Create a Restore Point
By default, System Protection—the service that manages restore points—may be disabled on some Windows 11 devices, especially those with limited storage or OEM configurations. Here’s how to enable it and create a restore point:
Step 1: Enable System Protection
Open System Properties:
Press Windows + S to open the search bar.
Type Create a restore point and select it from the results.
Check Protection Settings:
In the System Properties window, go to the System Protection tab.
Under Protection Settings, check if your system drive (usually C:) shows Protection as On or Off.
If Off, select the drive and click Configure.
Turn On System Protection:
In the new window, select Turn on system protection.
Use the slider under Disk Space Usage to allocate space for restore points (5–10% of the drive is recommended, e.g., 5–10 GB on a 100 GB drive).
Click Apply and OK to save changes.
Step 2: Create a Restore Point
Access the Create Option:
In the System Properties window (still on the System Protection tab), click Create.
Name the Restore Point:
Enter a descriptive name (e.g., “Before Driver Update June 2025”) to identify it later.
Click Create and wait a few seconds for the process to complete.
Confirm Success:
A message will confirm the restore point was created successfully. Click Close.
Note: Windows limits restore point creation to one every 24 hours by default. To create them more frequently, modify the registry key HKLM\SOFTWARE\Microsoft\Windows NT\CurrentVersion\SystemRestore, setting SystemRestorePointCreationFrequency to 0.
Best Practices for Managing Restore Points in Windows 11
Given the 10-to-60-day retention window and the potential for early deletion due to disk space constraints, users must adopt proactive strategies to ensure restore points are available when needed. Here are key recommendations:
Schedule Regular Restore Points:
Create a restore point every 2–3 weeks, especially before installing software, drivers, or Windows updates. Set calendar reminders to stay consistent.
Since points may expire in as little as 10 days on some releases, frequent creation is critical.
Monitor Disk Space Allocation:
Allocate sufficient disk space for restore points (5–10% of your drive) to minimize premature deletion. Check this in the System Protection settings.
Verify System Protection Is Enabled:
After major Windows updates or upgrades, confirm that System Protection remains enabled, as updates can sometimes disable it.
Check multiple drives if you have additional partitions where restore points are needed.
Combine with Other Backup Strategies:
Restore points aren’t a substitute for full backups. Use tools like File History or third-party solutions (e.g., Macrium Reflect) to back up personal files and system images.
For critical systems, consider cloud backups or external drives for redundancy.
Understand Recall’s Role:
Recall, while powerful, isn’t a replacement for restore points. It captures user activity (e.g., documents, web browsing) for searching, not system configurations.
Its storage demands on Copilot+ PCs may indirectly reduce the lifespan of restore points, so monitor disk usage closely.
Educate Your Team or Household:
If managing multiple PCs (e.g., in a business or family setting), ensure all users understand the 60-day limit and the need for regular restore point creation.
Document processes for creating and checking restore points to maintain consistency.
Why Mindfulness Matters in Restore Point Processes
The shortened retention period for restore points in Windows 11—down to 10 days in some cases—means users can’t rely on automatic snapshots alone. Without regular manual intervention, you risk losing the ability to revert to a stable system state after a failure. This is particularly critical for power users, IT administrators, or anyone frequently tweaking system settings. The introduction of Recall further complicates matters, as its disk usage may accelerate the deletion of older restore points.
To build a robust recovery strategy, treat restore points as a proactive, scheduled task rather than a set-and-forget feature. For example, before installing a new graphics driver, create a restore point named “Pre-Graphics Driver Install.” If issues arise, you’ll have a recent snapshot to fall back on—provided it’s within the 10-to-60-day window. Neglecting this could leave you with no recovery options, forcing a time-consuming reset or reinstall. Be mindful, plan ahead, and make restore points a cornerstone of your PC maintenance routine to stay protected.
Your patients enjoy the convenience of your telemedicine processes. But are the year end Telehealth Policy changes going to interfere?
Telehealth rules are changing now things have calmed down from the Public Health Emergency and the year is closing. Fortunately, the Center for Connected Health Policy is your resource for learning what’s new in the world of telehealth. Go to https://www.cchpca.org/all-telehealth-policies/ and search for policies by state.
Taking a few minutes to prepare for the changes can save you and your patients time and money.
Novitas Solutions has issued their reminder that is it decision making time. The following information was released in their MLN… Read more Novitas Announces the 2026 Medicare Participation Deadline › The post Novitas Announces the 2026 Medicare Participation Deadline appeared first on MAR Solutions, LLC.
When filling out credentialing forms, resist listing multiple taxonomy codes to show all your specialties. It may seem logical, but… Read more Stick with one taxonomy. More isn’t better. › The post Stick with one taxonomy. More isn’t better. appeared first on MAR Solutions, LLC.